Author: admin

Small Backyard, Big Potential: How to Make the Most of Your Outdoor Space

Small Edmonton backyard with patio, pergola, privacy screen and landscaping

When you picture your dream backyard, you might imagine a large property with an outdoor kitchen, fireplace, gardens, patio and plenty of room for entertaining.

But an incredible backyard does not require an enormous property.

With thoughtful planning, smaller outdoor spaces can be comfortable, functional and visually impressive. In fact, when every square foot matters, good design becomes even more important.

The goal of small backyard landscaping in Edmonton is not to fit as many features as possible into the yard. It is to choose the right features and make them work together.

Here are several ways to make a smaller backyard feel more functional without making it feel crowded.

Table of Contents

Decide How You Will Actually Use the Backyard

When outdoor space is limited, begin with your priorities.

Think about what you really want to do outside.

Do you regularly entertain friends and family? Would you rather have a quiet seating area? Do children or pets need open space? Is a hot tub important? Would you prefer gardens and planting over a large lawn?

It is easy to build a wish list based on everything you have seen in other backyards. The problem is that attempting to fit too many features into a compact yard can make the entire space feel smaller.

Instead, determine what you will actually use.

A backyard with three carefully planned features can feel much more enjoyable than one trying to accommodate ten different ideas.

Choose Features That Serve More Than One Purpose

Multifunctional design is particularly valuable in small spaces.

For example, a retaining wall can sometimes incorporate seating. A privacy screen can separate an area while also serving as a backdrop for plants or lighting. Built-in benches can provide seating without requiring as much room as large pieces of outdoor furniture.

Even patios and decks can be shaped to naturally define dining and seating areas.

When one feature performs two functions, you can get more value out of the limited space available.

This is one reason professional landscape design in Edmonton can be useful for compact properties. A designer can look at the yard as a whole and find opportunities that may be difficult to see when each feature is considered separately.

Think Vertically

When there is not much room to expand outward, make use of vertical space.

Pergolas, trellises, privacy screens, fences and vertical planting can introduce architectural interest without taking away large amounts of usable ground space.

Vertical elements can also help an outdoor area feel more like a defined room.

A pergola over a seating area, for example, gives the space height and structure. A privacy screen behind a hot tub or patio can make the area feel more private while creating a surface for lighting or decorative features.

Climbing plants and raised planters can add greenery without requiring large garden beds.

Drawing the eye upward also helps prevent the boundaries of the property from becoming the main focus.

Make Privacy Part of the Original Design

Compact yards, particularly in newer neighbourhoods, can sometimes feel very close to neighbouring properties.

Privacy should therefore be considered early in the design process.

Fencing, screens, pergolas, trees and carefully positioned plants can all help create more private areas without making the yard feel completely enclosed.

The key is deciding where privacy matters most.

You may not need to block every sightline. Instead, concentrate screening around the areas where you will spend the most time, such as a dining table, hot tub, patio or lounge space.

Strategic placement can provide privacy while still allowing the backyard to feel open.

Use Lighting to Add Depth

Your backyard should not disappear when the sun goes down.

Landscape lighting can make a small outdoor space feel completely different in the evening.

Lighting along pathways, stairs, plants and architectural features helps guide the eye through different areas of the yard. Illuminating several layers of the landscape can also make the property feel deeper than it would under one bright exterior light.

Feature lighting can highlight a privacy screen, tree, stone wall or garden bed, while softer lighting around seating areas can create a more comfortable atmosphere.

As an added benefit, a well-lit backyard remains visually appealing when viewed from inside the home.

Avoid Oversized Features

Scale matters in a smaller yard.

A patio, deck or pergola that is too large can dominate the space and leave little room for anything else. On the other hand, features that are appropriately sized can provide the same function while maintaining balance.

The same principle applies to furniture, planting and pathways.

Before choosing individual products or materials, consider how much room people need to comfortably move between different parts of the yard.

Leaving enough circulation space can make a compact backyard feel much more comfortable.

Design the Entire Yard Before You Build

This is one of the most important considerations for any small backyard.

Every decision affects something else.

The location of a hot tub can determine where a privacy screen should go. The dimensions of a deck can influence how much room remains for a patio. A pergola may affect lighting placement. Planting beds can change the available lawn area.

Drainage, grading and access must also continue to function properly regardless of how many features you want to incorporate.

Creating a complete plan before construction begins allows these relationships to be considered in advance.

Even if you intend to complete the backyard over several years, having a complete design gives you a roadmap. It reduces the chance that something installed during the first phase will interfere with an idea you want to add later.

Make Every Square Foot Count

Successful backyard landscaping in Edmonton is not determined by the size of the property.

A thoughtfully designed compact yard can still provide space for cooking, entertaining, relaxing, gardening and enjoying time outside.

Greentree Outdoor Living designs and builds complete exterior spaces that can incorporate patios, decks, pergolas, planting, lighting, fire features, outdoor kitchens, hot tubs and other landscaping elements.

For homeowners with smaller properties, looking at all of those elements together can be especially valuable.

Instead of asking how much you can squeeze into the backyard, consider which features will improve the way you actually use it.

Small Yard, Big Ideas

Your dream backyard is not defined by square footage.

In many cases, a smaller yard simply requires more intentional decisions. Prioritizing the features you value most, using multifunctional elements, thinking vertically and planning privacy from the beginning can transform even a compact property.

With the right design, a smaller Edmonton backyard can become a comfortable outdoor space that feels organized, welcoming and surprisingly spacious.

This post first appeared on https://blog.renovationfind.com

7 Ways to Extend Your Outdoor Living Season in Alberta

Edmonton outdoor living space with fire feature, pergola and patio lighting

Living in Alberta means making the most of every warm and sunny day. While Edmonton’s summer season can feel short, the right backyard design can help you spend more time outside during spring, fall and even the early parts of winter.

Extending the outdoor season does not necessarily mean installing one particular feature. The most effective outdoor spaces combine warmth, shelter, lighting and functional gathering areas to make the backyard comfortable in different conditions.

If you are planning outdoor living in Edmonton, here are seven features worth considering.

Table of Contents

1. Add a Fire Feature

Few things make a cool evening more inviting than a fire.

An outdoor fireplace, fire pit or fire table can create a natural gathering point while bringing warmth and atmosphere to the backyard. Surrounding the feature with comfortable seating can turn an ordinary patio into a place where family and friends want to spend time.

A fire feature can also become an important visual element in the landscape. Even when it is not being used, a well-positioned fireplace or fire pit can help anchor a seating area and establish a focal point.

The key is incorporating it into the design rather than treating it as an addition after everything else has been built.

2. Create a Covered Outdoor Space

Shelter can make a major difference in how frequently you use your backyard.

Pergolas, covered patios and other outdoor structures can create more comfortable gathering spaces while helping define different areas of the yard.

A covered seating or dining area can become an extension of your home when it is paired with features such as lighting, furniture and nearby heating or fire features.

Shelter also gives the backyard more structure. Instead of having one large open area, homeowners can create recognizable outdoor rooms for dining, relaxing and entertaining.

3. Incorporate Landscape Lighting

Summer evenings in Edmonton offer plenty of daylight, but that changes quickly as fall approaches.

Strategically placed landscape lighting allows you to continue using your yard once the sun goes down. Lights can illuminate pathways, stairs and entrances while highlighting plants, retaining walls, architectural details and other landscape features.

Good lighting also changes the atmosphere of an outdoor space.

Rather than relying on one bright fixture, different layers of lighting can help create a warmer and more comfortable environment around patios and entertaining areas.

Lighting is particularly important when planning landscape design in Edmonton because it can make an outdoor space both more functional and visually appealing during Alberta’s longer evenings.

4. Make the Hot Tub Part of the Landscape

Some backyard features become even more enjoyable as temperatures fall, and a hot tub is a perfect example.

Instead of placing a hot tub wherever there happens to be room, consider how it fits into the entire backyard.

How far is it from the house? Is there a comfortable path leading to it? Does the area have enough privacy? Is there suitable lighting? Could the surrounding patio or deck make getting in and out easier?

These questions become particularly important when it is cold outside.

Integrating the hot tub into the landscape can make it feel like a natural part of the backyard instead of a piece of equipment placed in an unused corner.

5. Create Protection From the Wind

Sometimes the wind is more responsible than the temperature for sending everyone indoors.

Privacy screens, fencing, pergolas, walls and carefully positioned landscaping can help create areas that feel more protected.

These features can serve several purposes at once. A privacy screen might reduce exposure while separating one part of the yard from another. Trees and shrubs can provide screening while also contributing colour and texture.

When designing the backyard, it helps to think about where wind generally comes from and where you are most likely to sit during cooler weather.

A protected seating area may remain comfortable much longer than an exposed patio elsewhere on the property.

6. Build an Outdoor Cooking and Entertaining Area

Outdoor kitchens are not only useful during the middle of summer.

A well-designed cooking area gives homeowners another reason to spend time outdoors during spring and fall. Built-in grills, counters, storage and seating can make outdoor cooking more practical while keeping the person preparing food connected to the rest of the group.

Outdoor kitchens become even more useful when incorporated into a larger entertaining area.

Pairing the kitchen with a patio, covered structure, lighting and nearby fire feature can create a backyard gathering area that remains appealing long after peak summer weather has passed.

7. Design the Backyard for Multiple Seasons

Perhaps the most important way to extend your outdoor living season is to think about seasonality before construction starts.

Your patio, deck, landscaping, lighting, shelter and entertainment areas should work together.

Consider where sunlight reaches the yard at different times of day. Think about where shelter would be most useful, how people will move around the property after dark and which areas you are most likely to use during cooler months.

A professional Edmonton landscaping contractor can help bring these considerations together as part of one complete design rather than treating each feature as a separate project.

Greentree Outdoor Living provides landscape design and construction services for projects that can include patios, pathways, decks, pergolas, outdoor kitchens, fireplaces, planting and other exterior features.

Make More of Alberta’s Outdoor Season

You cannot control Edmonton’s weather, but you can design your backyard around it.

A fire feature can make cool evenings more comfortable. A pergola can create a sheltered gathering area. Lighting allows the yard to remain functional after sunset, while thoughtful placement of hot tubs, kitchens and seating can make the entire outdoor space easier to use.

Most importantly, designing these elements together helps create a backyard that works as a complete outdoor living environment.

With thoughtful planning, a short Alberta summer does not have to mean a short outdoor living season.

This post first appeared on https://blog.renovationfind.com

Why Fall & Winter Are the Perfect Time to Design Your Backyard

Edmonton backyard landscape design with patio and outdoor living features

When temperatures begin to drop and another Edmonton summer comes to an end, landscaping may be one of the last things on your mind. However, if you are hoping to transform your outdoor space next year, fall and winter can actually be some of the best times to start planning.

Beginning your project before spring gives you more time to think through the design, compare materials, choose the features you really want and prepare for the next construction season. Rather than rushing to make decisions once the snow melts, you can take a more thoughtful approach to your backyard.

For homeowners considering landscape design in Edmonton, the colder months provide an opportunity to turn ideas into a complete plan before landscaping season gets busy.

Table of Contents

Give Yourself Time to Get the Design Right

A successful outdoor space starts with a clear design.

When you begin planning during fall or winter, there is less pressure to make immediate decisions simply because the construction season has already arrived. Instead, you can take time to think about how you want the space to look, how you plan to use it and which features matter most.

Maybe your goal is a large patio for entertaining. Perhaps you want a new deck, pergola, outdoor kitchen, fireplace, hot tub area or more usable green space for your family.

Planning these elements together can help create a backyard that feels intentional rather than a collection of separate projects.

Working with an experienced Edmonton landscaping company also allows you to look at the entire property before deciding where individual features should go.

Visualize the Finished Backyard Before Construction

One of the biggest challenges with landscaping is imagining how all the individual pieces will look once they are combined.

A professional landscape design helps take some of that guesswork out of the process. Homeowners can explore layouts, materials and features before construction begins rather than discovering halfway through the project that something does not look or function as expected.

Greentree Outdoor Living approaches landscape projects as a complete design-and-build process. That means factors such as patios, pathways, decks, planting, retaining walls, outdoor structures and entertainment areas can be considered together.

The result is a clearer picture of how the finished backyard will function.

And when there is snow covering the yard outside, being able to plan what next summer could look like can make the winter months a little more exciting.

Take More Time to Choose Materials and Features

There are plenty of decisions involved in creating an outdoor living space.

Homeowners may need to select paving materials, deck finishes, colours, lighting, plants, outdoor structures and other details. Larger projects can involve even more decisions, especially when features such as outdoor kitchens, fireplaces, water features or custom carpentry are included.

Starting earlier gives you more time to consider those choices instead of making them quickly because a construction date is approaching.

It can also help you establish priorities. If everything on your wish list does not fit into the first phase of the project, a complete design can make it easier to determine what should be completed now and what can be added later.

Plan for a Backyard That Can Grow With You

Not every backyard transformation needs to happen at once.

Some homeowners prefer to complete landscaping in stages because of budget, timing or the overall size of the project. If that is the case, designing the entire yard in advance becomes even more valuable.

For example, the location of a future outdoor kitchen may affect the size of your patio. A future hot tub could change where privacy screens, electrical connections or pathways should be located. A pergola could influence lighting and seating arrangements.

Thinking through those relationships early can help prevent a feature installed during the first phase from becoming an obstacle later.

Be Better Prepared When Spring Arrives

Once Edmonton begins warming up, homeowners naturally start thinking about spending more time outside. That is also when interest in landscaping projects increases.

If you wait until spring to begin thinking about your backyard, the first part of the season may be spent discussing designs, comparing options and deciding what you want.

Starting during fall or winter gives you an opportunity to have more of those decisions made ahead of time.

Instead of beginning with a blank page in spring, you can already have a clear direction for your project.

Design for Edmonton’s Outdoor Lifestyle

A backyard in Alberta needs to do more than look good on a perfect July afternoon.

Thoughtful backyard landscaping in Edmonton should consider how homeowners actually use their space throughout the warmer months and into spring and fall. Comfortable seating areas, lighting, shelter, fire features and well-planned pathways can all contribute to an outdoor space that is more enjoyable throughout the season.

Greentree Outdoor Living designs and builds complete outdoor environments, bringing landscaping, hardscaping and exterior living features together in one plan.

Starting that process in fall or winter gives you time to think carefully about the space you want rather than rushing once warmer weather arrives.

Turn This Winter Into Next Summer

Your backyard may be covered in snow for part of the year, but your landscaping plans do not have to be put on hold.

Fall and winter can be the perfect opportunity to gather inspiration, establish priorities and begin creating an outdoor space that fits your lifestyle.

By planning ahead, you can enter the next landscaping season with a clearer vision of what you want and how the different parts of your backyard will work together.

This post first appeared on https://blog.renovationfind.com

Fix It Before Your Father-in-Law Offers To

Every family has one. Maybe it’s your father-in-law, maybe it’s an uncle, maybe it’s your own mom. They walk through the door, set down their bag, and within fifteen minutes they’ve found the ceiling fan that wobbles. “You know, that’s just a balancing issue. I could fix that in ten minutes. Do you have a screwdriver?”

Their heart is in the right place. But you’d probably rather spend the visit catching up than handing tools up a ladder. The solution is simple: knock out those common home repairs before the family arrives, and leave them nothing to fix but a cup of coffee.

Beat the toolbox to the punch. Our local craftsmen can tackle your home repair list before the first car pulls into the driveway.

Find a Location Near You or Call 800-88-HANDY (42639)

Why Unfinished Repairs Attract Unsolicited Advice

Small home repairs are easy to live with. You learn to jiggle the toilet handle, skip the squeaky floorboard, and lift the gate just right to open it. Visitors haven’t learned those tricks yet, so every quirk in your house is brand new to them. And for the handy relative, a quirk isn’t an annoyance. It’s an invitation.

Here are the common home repairs most likely to start a conversation, along with what you’ll hear and how to fix them for real.

The Repairs Most Likely to Start a Conversation

The Wobbly Ceiling Fan

What you’ll hear: “That thing’s going to come down one of these days.”

The real fix: A wobbling ceiling fan usually means loose blade screws, a bent blade bracket, or blades that are out of balance. In some cases the fan isn’t mounted to a fan-rated electrical box, which is a safety concern worth addressing. Tightening the hardware, balancing the blades, or properly re-mounting the fan gets it spinning smoothly again.

The Toilet That Runs All Night

What you’ll hear: A 2 a.m. clatter from the bathroom as someone takes the tank lid off “just to take a look.”

The real fix: A running toilet is usually caused by a worn flapper, a fill valve that’s out of adjustment, or a chain that’s too long or too short. These parts are inexpensive, and replacing them stops the noise and the wasted water.

The Squeaky Floorboard

What you’ll hear: “Hear that? That’s a loose subfloor. You just need a couple of screws.”

The real fix: Squeaks happen when floorboards or subfloor rub against nails or each other. Depending on your flooring and access from below, a craftsman can secure the subfloor, add shims, or use specialty screws designed to quiet squeaks without damaging the finish.

The Sagging Fence Gate

What you’ll hear: “Your post is leaning. I’d reset that whole thing.”

The real fix: Gates sag from loose hinges, a weakened gate frame, or a leaning post. Adding an anti-sag kit, replacing hinges, or straightening and re-securing the post keeps the gate swinging and latching the way it should.

The Window That Won’t Stay Open

What you’ll hear: “Oh, just prop it with a book.”

The real fix: Windows that stick, slam, or won’t stay up often have worn balances, paint-sealed sashes, or dirty tracks. Freeing up the sash, cleaning and lubricating the tracks, or replacing the balance hardware makes them easy and safe to use.

Want the house running smoothly before the relatives roll in? Handyman Connection craftsmen handle ceiling fans, toilets, doors, windows, fences, and more in one visit.

Find a Location Near You or Call 800-88-HANDY (42639)

The Drawer That Comes Off in Your Hand

What you’ll hear: “These slides are shot. They make soft-close ones now, you know.”

The real fix: Kitchen and dresser drawers fall out of alignment when slides wear out, screws loosen, or the drawer box comes apart. Repairing the box or installing new drawer slides (soft-close included, if you want to make him proud) solves it.

The Faucet That Drips

What you’ll hear: “Drip. Drip. Drip. That’s money going down the drain.”

The real fix: A dripping faucet usually needs a new cartridge, washer, or O-ring. It’s one of the most common home repairs, and it makes the kitchen noticeably quieter when the house finally settles down for the night.

The Deck Board Everyone Trips On

What you’ll hear: “Watch that one. Somebody’s going to catch a toe.”

The real fix: Raised nails, popped screws, and warped boards are common on older decks. Re-fastening loose boards, replacing damaged ones, and checking the railings makes your deck safer for everyone heading out to the grill.

The Outlet That Keeps Tripping

What you’ll hear: “You’ve got too much plugged in here. Who wired this?”

The real fix: A GFCI outlet that trips often may be worn out, overloaded, or reacting to moisture. A frequently tripping outlet is worth having checked and, if needed, replaced, especially in kitchens and bathrooms that get extra use when the house is full.

Why You Shouldn’t Let Him Climb the Ladder

Here’s the serious part. Ladder falls send thousands of people to the emergency room every year, and projects like cleaning gutters, changing high light bulbs, and fixing ceiling fans are prime time for them. A relative who’s eager to help may not know your home, your ladder, or the condition of your gutters and roofline.

Scheduling common home repairs ahead of a visit means nobody has to climb, wire, or wrestle with anything while they’re supposed to be relaxing. It’s a gift for everyone, and an easy one to give.

How to Graciously Decline the Help

Even with your list finished, the offer might still come. A few tried-and-true responses:

  • “Thanks, but I’ve already got a guy for that.”
  • “It’s actually scheduled. Want another coffee?”
  • “The handyman fixed that last week. Can you believe it?”
  • “You’re visiting. Sit down and watch the game.”

Your Pre-Visit Home Repair Checklist

  • Balance or re-secure wobbly ceiling fans.
  • Repair running toilets and dripping faucets.
  • Quiet squeaky floorboards and stairs.
  • Fix the sagging gate and loose fence boards.
  • Free up sticking windows and replace worn balances.
  • Repair or replace broken drawer slides.
  • Re-fasten or replace loose deck boards and check railings.
  • Have frequently tripping outlets inspected.
  • Replace hard-to-reach light bulbs so no one else has to climb up there.

Frequently Asked Questions

What home repairs should I do before family visits?

Focus on the things visitors notice and use most: ceiling fans, toilets, faucets, squeaky floors, sticking windows and doors, loose drawers, deck boards, and outdoor gates. Fixing these ahead of time keeps your home comfortable and safe for a full house.

Why does my ceiling fan wobble?

Ceiling fans usually wobble because of loose blade screws, bent blade brackets, or unbalanced blades. A fan that isn’t mounted to a fan-rated electrical box can also wobble and should be corrected for safety.

How do I stop a toilet from running?

Most running toilets are caused by a worn flapper, a fill valve that needs adjusting, or a flapper chain that’s the wrong length. Replacing or adjusting these inexpensive parts typically stops the running.

Can a handyman fix squeaky floors?

Yes. Depending on the type of flooring and access from below, a craftsman can secure the subfloor, add shims, or use specialty screws to stop squeaks. Contact your local Handyman Connection to confirm services available in your area.

How far ahead should I schedule repairs before company comes?

Booking two to four weeks ahead is a good rule of thumb. It gives you time to get on the schedule and makes sure everything is finished before your family arrives.

Leave the Toolbox in the Trunk With Handyman Connection

Your family is coming to see you, not to fix your fan. Let Handyman Connection’s skilled local craftsmen handle the ceiling fans and outlets, running toilets and dripping faucets, floors, drawers, and doors, fence and gate repairs, and deck fixes on your list, all with One Call. One Connection.®

Fix it before anyone offers to. Find your local Handyman Connection and schedule your home repairs today.

Find a Location Near You or Call 800-88-HANDY (42639)

The post Fix It Before Your Father-in-Law Offers To appeared first on Handyman Connection.

Your House Is Hosting. Is It Ready for the Group Chat?

The invitations are out, the menu is planned, and the guest room has fresh sheets. But your guests won’t be judging the turkey. They’ll be noticing the bathroom door that won’t latch, the towel bar that swings when they grab it, and that mysterious hole peeking out from behind a picture frame. And yes, some of them will mention it in the group chat.

The good news is that most of the things guests notice are small, quick home repairs. Knock them out before the holidays, and your house can be the one everyone texts about for the right reasons.

Hosting soon? Our local craftsmen can tackle your whole pre-guest punch list in one visit.

Find a Location Near You or Call 800-88-HANDY (42639)

The Guest Bathroom: Where Every Detail Gets Noticed

The guest bathroom is the one room every visitor uses, and they use it alone, with plenty of time to look around. It’s the most important place to focus your home repairs before guests arrive.

The Bathroom Door That Won’t Latch

Nothing makes a guest more uncomfortable than a bathroom door that drifts open or a lock that doesn’t catch. Usually the cause is simple: a strike plate that has shifted out of alignment, loose hinge screws that let the door sag, or a worn-out latch. Tightening hinges with longer screws, adjusting the strike plate, or replacing the privacy hardware typically solves the problem fast.

The Loose Towel Bar

Towel bars and toilet paper holders take a lot of tugging, and when they’re mounted into drywall without proper anchors, they eventually pull loose. Re-mounting them into studs or with heavy-duty anchors, and patching the old holes, makes them feel solid again.

Other Guest Bathroom Fixes

  • Running toilets and dripping faucets. Both are noisy, noticeable, and usually simple to repair.
  • Cracked or moldy caulk. Fresh caulk around the tub, shower, and sink makes the whole bathroom look cleaner instantly.
  • A noisy or weak exhaust fan. With a full house, the bathroom fan works overtime.
  • A wobbly toilet seat or vanity handle. Small, but guests feel it every time.

The Mysterious Hole Behind the Picture Frame

Every home has one: the hole from an old anchor, a nail that missed the stud, or a TV mount that got moved. Maybe you hung a picture over it and called it fixed. Guests leaning on the wall, straightening frames, or simply sitting nearby will spot it.

Drywall repairs are some of the most common home repairs before guests, and they make a big visual difference:

  • Patch small holes and dings from nails, anchors, and door handles.
  • Fix nail pops, those little bumps where drywall screws or nails have pushed through the surface.
  • Repair larger holes with a proper drywall patch, texture match, and paint.
  • Touch up paint on scuffed hallways, door frames, and baseboards.
  • Rehang artwork and mirrors correctly, using the right hardware so the frame hangs level and stays put.

Doors, Drawers, and Everything That Squeaks

When your house is full, every door gets opened and every drawer gets pulled. Small annoyances you’ve learned to ignore suddenly become very loud.

  • Squeaky hinges on bedroom and bathroom doors.
  • Sticking or rubbing doors that need to be planed or adjusted.
  • Sagging cabinet doors and loose cabinet hinges in the kitchen.
  • Loose knobs and pulls on cabinets, dressers, and closet doors.
  • Closet doors that jump the track, especially bifold and sliding doors in the guest room.

Got a punch list of little things? Handyman Connection craftsmen handle drywall patches, door

Find a Location Near You or Call 800-88-HANDY (42639)

The post Your House Is Hosting. Is It Ready for the Group Chat? appeared first on Handyman Connection.

Your Least Favorite Uninvited Guest

Your Least Favorite Uninvited Guest: The Laundry Chair Has Become a Permanent Resident

It started innocently. A sweater you wore for two hours. Jeans that weren’t dirty, exactly. A hoodie you planned to put away “later.” Now the chair in the corner of your bedroom hasn’t been sat in since spring, and it’s wearing three outfits, a work bag, and a towel that definitely should be in the hamper.

Almost every home has a clothes chair. It’s not a sign that you’re messy. It’s a sign that your closet storage isn’t working the way you actually live. The fix isn’t more willpower. It’s giving those clothes a better, easier place to go.

Ready to evict the clothes chair for good? Our local craftsmen build and install custom closet storage, shelving, and organization solutions.

Find a Location Near You or Call 800-88-HANDY (42639)

Why the Laundry Chair Moves In

The clothes chair exists because of one stubborn category: clothes that are too clean for the hamper but too worn to go back with the freshly folded stuff. Most homes have a spot for clean clothes and a spot for dirty ones, but nothing in between. So the chair volunteers.

A few other common reasons the laundry chair becomes a permanent resident:

  • The closet is too full. If you have to wrestle a hanger back onto a packed rod, the chair wins every time.
  • The closet is inconvenient. Sticky sliding doors, a dark interior, or shelves out of reach make putting things away feel like a chore.
  • There’s no landing zone. No hooks, no valet rod, and no hamper nearby means clothes land wherever is closest.
  • The laundry room can’t keep up. When there’s nowhere to fold or hang clean clothes, they travel to the bedroom in a basket and get dumped on the chair.

The Real Cost of the Clothes Chair

A pile of clothes might seem harmless, but it adds up. Clothes on a chair wrinkle, stretch, and get re-washed more often than they need to, which wears them out faster. You lose a perfectly good piece of furniture. And visual clutter in the bedroom, the one room meant for rest, can make the whole space feel more stressful and less relaxing.

The pile also tends to spread. Once the chair is full, the overflow migrates to the end of the bed, the dresser top, and eventually the floor. Better closet storage stops the cycle before it starts.

Give “Worn Once” Clothes a Real Home

The easiest way to retire the clothes chair is to replace it with something designed for the same job. A dedicated spot for worn-once clothes keeps them aired out, wrinkle-free, and off the furniture.

  • Wall-mounted hooks or a peg rail. A row of sturdy hooks near the closet or bedroom door holds jeans, sweaters, robes, and bags in plain sight.
  • A valet rod. This pull-out rod mounts inside the closet and gives you a spot to hang tomorrow’s outfit or something you’ll wear again.
  • Over-the-door racks. A quick, low-commitment option for small bedrooms and apartments.
  • A wall-mounted clothing rack or open shelf. A short rod with a shelf above turns an empty wall into a tidy, intentional landing zone.
  • A storage bench. Swap the chair for a bench with built-in bins or cubbies so worn-once clothes have a place to fold and hide.

Make Your Closet Easier to Use Than the Chair

Here’s the rule: if the chair is easier to use than the closet, the chair wins. Good closet storage removes every bit of friction between taking something off and putting it away.

  • Install a closet storage system. Custom shelving, double hanging rods, drawers, and cubbies can nearly double the usable space of a standard reach-in closet.
  • Add double hanging rods. Shirts, blouses, and folded pants take up half the height of a full rod. Two stacked rods fit twice as much.
  • Use adjustable shelving. Shelves you can move as your wardrobe changes keep stacks from toppling and spilling back onto the chair.
  • Add pull-out baskets and bins. These are perfect for workout clothes, loungewear, and other items that don’t fold neatly.
  • Fix the doors. Bifold and sliding closet doors that stick or jump the track make you avoid the closet. Repairing or replacing them makes a surprising difference.
  • Light it up. A closet you can’t see into is a closet you won’t use. Battery-powered LED strips or a new hardwired fixture help you find (and put back) what you need.

Is your closet working against you? Handyman Connection craftsmen can install closet storage systems, shelving, valet rods, and new closet doors that make putting clothes away the easy choice.

Find a Location Near You or Call 800-88-HANDY (42639)

Upgrade the Laundry Room So Clothes Don’t Pile Up

Sometimes the clothes chair isn’t a bedroom problem at all. It’s a laundry room problem. When clean clothes have nowhere to go after the dryer, they end up in baskets, and baskets end up on chairs.

Laundry room storage upgrades that keep clothes moving:

  • A folding counter. A sturdy countertop over front-loading machines or along a wall gives you a place to fold right away.
  • A hanging rod. Hang shirts and dresses straight from the dryer so they never get wrinkled in the first place.
  • Wall cabinets and open shelving. Keep detergent and supplies off the counter so the folding space stays clear.
  • Sorting stations. Built-in bins or cubbies labeled by family member make it easy to sort clothes and send them to the right room.

Rethink Bedroom Storage Beyond the Closet

If your closet is small and can’t be expanded, the rest of your bedroom can pick up the slack. Built-in shelving or cabinetry on either side of a window, under-bed drawers, a window seat with storage inside, or a properly anchored wall unit can add serious bedroom storage without crowding the room. Even a correctly assembled and installed dresser or armoire can give the chair’s contents somewhere better to live.

Your Laundry Chair Eviction Checklist

  • Sort the chair pile into three groups: put away, wash, and donate.
  • Add hooks, a valet rod, or a rack for worn-once clothes.
  • Declutter your closet so there’s room to hang things easily.
  • Upgrade to a closet storage system with double rods and adjustable shelving.
  • Repair sticky or broken closet doors.
  • Add lighting inside the closet.
  • Place a hamper where clothes actually come off.
  • Add a folding counter and hanging rod in the laundry room.
  • Swap the chair for a storage bench, or reclaim it as an actual place to sit.

Frequently Asked Questions

Why does everyone have a clothes chair?

Most homes have storage for clean clothes and a hamper for dirty ones, but nowhere for clothes worn once that can be worn again. Without a designated spot, those clothes land on the nearest chair. Adding hooks, a valet rod, or a small rack solves the problem.

What is the best closet storage system for a small closet?

For small reach-in closets, double hanging rods, adjustable shelving, and pull-out bins make the most of limited space. Using the full height of the closet, including a high shelf and the back of the door, adds even more capacity.

How do I store clothes that aren’t dirty but have been worn?

Hang them on wall hooks, a peg rail, a valet rod, or a dedicated section of your closet. Keeping worn-once clothes separate and aired out helps them stay fresh until you wear them again.

Can a handyman install closet shelving and organizers?

Yes. Handyman Connection craftsmen install closet storage systems, shelving, hanging rods, hooks, closet doors, and custom built-ins. Services vary by location, so contact your local Handyman Connection to confirm what’s available in your area.

How can I add storage to a laundry room?

Wall cabinets, open shelving, a folding counter, and a hanging rod are the most useful laundry room storage upgrades. They keep supplies organized and give clean clothes a place to go before they pile up.

Show the Laundry Chair the Door With Handyman Connection

The clothes chair has overstayed its welcome. With smarter closet storage, a home for worn-once clothes, and a laundry room that keeps up, you can finally get your chair, and your bedroom, back. Handyman Connection’s skilled local craftsmen handle closet and storage solutions, custom carpentry and built-ins, and installations and repairs, all with One Call. One Connection.®

Reclaim your bedroom. Find your local Handyman Connection and schedule your closet storage project today.

Find a Location Near You or Call 800-88-HANDY (42639)

The post Your Least Favorite Uninvited Guest appeared first on Handyman Connection.

The 5 PM House: Why Your Home Feels Different After Dark

You walk in the door after work, and it’s already dark. The entryway is a shadowy mess of shoes and keys, the hallway looks like a tunnel, and the living room you love in July suddenly feels flat and gloomy. Nothing about your house changed. The light did.

When daylight saving time ends, most of us lose our evening daylight almost overnight. That shift exposes every weak spot in your home lighting, from the single bulb over the front door to the dim hallway that never got a proper fixture. The good news is that a few smart upgrades to lighting and paint can make your home feel warm, bright, and welcoming, even at 5 PM in December.

Ready to brighten things up before the clocks change? Our local craftsmen handle lighting fixture installs, painting, and more.

Find a Location Near You or Call 800-88-HANDY (42639)

What Happens When Daylight Saving Time Ends

In 2026, daylight saving time ends on Sunday, November 1, when clocks fall back one hour at 2 a.m. You gain an hour of sleep, but you trade away an hour of evening light. In much of the country, sunset jumps from around 6:30 PM to well before 5:30 PM, and it keeps getting earlier until the winter solstice in late December.

That means the hours you actually spend at home on weekdays, the commute home, dinner, homework, and winding down, now happen almost entirely under artificial light. If your home lighting was designed around summer evenings (or not really designed at all), you’ll feel the difference right away.

Why Your Home Feels Different After Dark

Daylight is bright, even, and comes from big openings like windows and doors. Artificial home lighting usually comes from a handful of small points: a ceiling fixture here, a lamp there. That creates three problems once the sun goes down early:

  • Harsh contrast. Bright pools of light next to dark corners make rooms feel smaller and more closed in.
  • Color shifts. Paint colors that look soft and airy in daylight can turn muddy, gray, or cold under the wrong bulbs.
  • Forgotten spaces. Entryways, hallways, stairs, and closets rarely get good lighting because during summer evenings you barely noticed them.

Fixing these issues isn’t about flooding your home with light. It’s about putting the right light in the right places and choosing surfaces that help that light go further.

The Dark Entryway: Your 5 PM First Impression

Your entryway is the first room you see after dark, and it’s often the worst-lit space in the house. Fumbling for keys on a dark porch or stepping into a black foyer isn’t just annoying. It’s a safety issue for trips and falls, and a dark front door can make your home a more appealing target.

Simple entryway lighting upgrades that make a big difference include:

  • Brighter, better porch fixtures. Replace an undersized or outdated porch light with a fixture scaled to your door and rated for outdoor use.
  • Motion-sensor or dusk-to-dawn lighting. Lights that turn on automatically mean you never come home to darkness, even as sunset times keep shifting.
  • Smart switches and timers. Schedule your foyer and porch lights to turn on before you get home.
  • Interior entry lighting. A flush mount or semi-flush fixture in the foyer, paired with a switch right by the door, keeps you from walking into a dark house.
  • Path and step lighting. Low-voltage lights along walkways and steps help guests (and you) get to the door safely.

Dim Hallways and the In-Between Spaces

Hallways are the classic “5 PM” problem. Most have one ceiling light, no windows, and darker walls than they should. After daylight saving time ends, a dim hallway can start to feel like a tunnel connecting the bright rooms of your house.

To brighten a dim hallway:

  • Add fixtures, not just wattage. Two or three evenly spaced low-profile ceiling lights beat one bright bulb that leaves both ends in shadow.
  • Try wall sconces. Sconces bounce light off the walls and ceiling, making narrow hallways feel wider.
  • Install LED night lights or step lights. Plug-in or hardwired low-level lighting is especially helpful near bedrooms, bathrooms, and stairs for late-night trips.
  • Light the stairs. Stairways should be lit from top to bottom with switches at both ends. This is one of the most important home lighting upgrades for aging-in-place safety.

Tired of the tunnel hallway? Handyman Connection craftsmen can install new fixtures, sconces, switches, and stair lighting so your home feels bright from end to end.

Lighter Paint Colors That Work Harder in Low Light

Paint is one of the most underrated parts of home lighting. Every wall either reflects light back into the room or soaks it up. Dark or heavily saturated colors look dramatic on a sunny afternoon, but after dark they absorb what little light you have.

When you choose lighter paint colors for dim spaces, look for:

  • A high LRV (Light Reflectance Value). Every paint color has an LRV on a scale from 0 to 100. For hallways, entryways, and rooms without much natural light, colors with an LRV of 60 or higher help bounce light around the space.
  • Warm whites and soft neutrals. Creamy whites, light greige, and warm off-whites feel cozy under evening light instead of stark or cold.
  • The right finish. Eggshell and satin finishes reflect more light than flat paint and hold up better in high-traffic areas like halls and entries.
  • Bright ceilings. A clean white ceiling acts like a giant reflector for your overhead home lighting.

Before you commit, test paint samples on the wall and look at them at night under your actual bulbs. A color that looks perfect at noon can read very differently at 5 PM. Fall is a great time for interior painting, too, since you’re spending more time indoors and the house is easier to keep comfortable for drying.

Layer Your Home Lighting Room by Room

The most comfortable homes after dark use layered lighting, a mix of three types working together:

  • Ambient lighting provides overall brightness, like ceiling fixtures, recessed lights, and ceiling fans with light kits.
  • Task lighting focuses light where you work, like under-cabinet kitchen lights, vanity lights, and reading lamps.
  • Accent lighting adds warmth and depth, like sconces, picture lights, and LED strips on shelves.

Bulb color matters just as much as fixture placement. Warm bulbs around 2700K to 3000K feel relaxed and inviting in living rooms and bedrooms, while slightly cooler bulbs around 3000K to 4000K work well in kitchens, laundry rooms, and work areas. Adding dimmer switches lets you adjust your home lighting from bright and practical at dinner to soft and calm later in the evening.

Your Fall Home Lighting Checklist

Get ahead of the early sunsets with this quick checklist:

  • Replace burned-out and outdated bulbs with energy-efficient LEDs in consistent color temperatures.
  • Upgrade or add a porch light and consider motion-sensor or dusk-to-dawn fixtures.
  • Make sure the foyer has a light switch within reach of the front door.
  • Add fixtures, sconces, or night lights to dim hallways.
  • Light stairways from top to bottom with switches at both ends.
  • Install dimmers in living spaces and bedrooms.
  • Repaint dark entryways, hallways, and low-light rooms in lighter paint colors.
  • Add under-cabinet lighting in the kitchen for those early dark dinners.

Frequently Asked Questions

When does daylight saving time end in 2026?

Daylight saving time ends on Sunday, November 1, 2026, at 2 a.m., when clocks fall back one hour. After that, sunset moves to around 5 PM or earlier in much of the U.S.

How can I make a dark hallway brighter without windows?

Add more light sources rather than one bright bulb. Evenly spaced ceiling fixtures, wall sconces, and low-level night lights work well. Painting the walls a lighter color with a higher LRV and an eggshell or satin finish helps that light reflect further.

What paint colors make a room look brighter at night?

Warm whites, creamy off-whites, and light neutrals with an LRV of 60 or higher reflect the most light. Always test samples at night under your own bulbs, since artificial light can change how a color looks.

What is the best light bulb color for home lighting?

For living rooms and bedrooms, warm bulbs between 2700K and 3000K feel most inviting. For kitchens, bathrooms, and work areas, 3000K to 4000K offers crisper, more focused light.

Can a handyman install new light fixtures?

Yes. Handyman Connection craftsmen commonly replace and install light fixtures, ceiling fans, dimmer switches, and other home lighting upgrades. Services vary by location and local regulations, so contact your local Handyman Connection to confirm what’s available in your area.

Brighten Your 5 PM House With Handyman Connection

Early sunsets don’t have to mean gloomy evenings. With better entryway lighting, a brighter hallway, layered home lighting, and lighter paint colors, your house can feel just as welcoming in December as it does in June. Handyman Connection’s skilled local craftsmen can handle lighting and electrical upgrades, interior painting, and aging-in-place safety improvements, all with One Call. One Connection.®

Get your home ready for darker days. Find your local Handyman Connection and schedule your project today.

Find a Location Near You or Call 800-88-HANDY (42639)

The post The 5 PM House: Why Your Home Feels Different After Dark appeared first on Handyman Connection.

Bathroom Renovation Cost in Canada [Guide 2026]

Renovated bathroom with a modern vanity and tiled shower

A bathroom renovation does two jobs at once. It makes everyday life easier, and it can add to your home’s value. The nice thing about bathrooms is that you decide how far to go. You can build a spa-like primary bathroom, or simply freshen things up with new fixtures and paint. Before you start, it helps to have a clear plan. There’s a lot you could do, and it’s easy to get carried away and spend more than you need to.

Table of Contents

Bathroom Renovation Cost

This guide walks you through the main types of bathroom projects, what they cost in Canada in 2026, and a few simple ways to save.

Reasons to renovate

Start with why you want to renovate. Knowing your reason makes it much easier to set a budget and plan the design. Are you tired of how the bathroom looks and feels? Do you want a little more comfort in your primary bathroom? Or are there simply too few bathrooms for everyone in your home? There’s no wrong answer. Take a look at your home and what your family needs.

Aging-in-place

If you love your home and plan to stay, it’s worth thinking ahead. Bathrooms can get harder to use as we get older, and slippery floors and high tub walls can become a real safety concern. If you’re renovating anyway, build in a few aging-in-place changes now. It also makes life easier for visiting parents or grandparents.

Types of bathrooms

“Bathroom” is a general word, but when it comes to renovating, there are a few specific types to think about. Your project can be as simple or as detailed as you like, and the work involved changes with your goals. Knowing the common types gives you a head start on planning and design.

Powder room or guest bathroom

This is also called a “half bath” because it only has two fixtures: a toilet and a sink. It gives guests an easy bathroom to use without going upstairs. Most powder rooms are on the main floor, close to the living or dining room. Because there’s less to it than a full bathroom, it’s one of the more affordable bathrooms to add or update.

Three-fixture

A three-fixture bathroom has a toilet, a sink and a shower in a small floor plan. Often all three line up along one wall, across from the door, but the layout can change to suit your space. The goal is to keep the floor open. Like a powder room, it’s handy for guests or as a main-floor bathroom. Attach one to a guest room and it starts to feel like a private suite.

Full bathroom

A full bathroom is the classic setup: a tub and shower, a vanity sink and a toilet. Every home has at least one, usually near the bedrooms. More than one full bathroom adds value, but they don’t all need a tub. A shower-only full bathroom works well, as long as at least one other bathroom in the house still has a tub.

Utility bathroom

This layout combines a bathroom with another use, like laundry or a dressing area. It has the usual shower, sink and toilet, plus room for something extra. A laundry combo usually has a stacked washer and dryer to save floor space. A dressing-room combo is usually part of a primary suite, with a walk-in change area that works like a walk-in closet. Basement bathrooms get the most out of this layout, since every square foot needs to pull its weight.

Primary suite bathroom

A primary bathroom (often called a master bathroom) is all about space, comfort and privacy. It’s attached to the main bedroom and often has a calm, spa-like feel. These renovations usually cost more than a standard bathroom. A primary bathroom may have both a walk-in shower and a separate soaker tub. Because it’s designed around the people who use it, no two are the same. A well-done primary bathroom is one of the features buyers notice most.
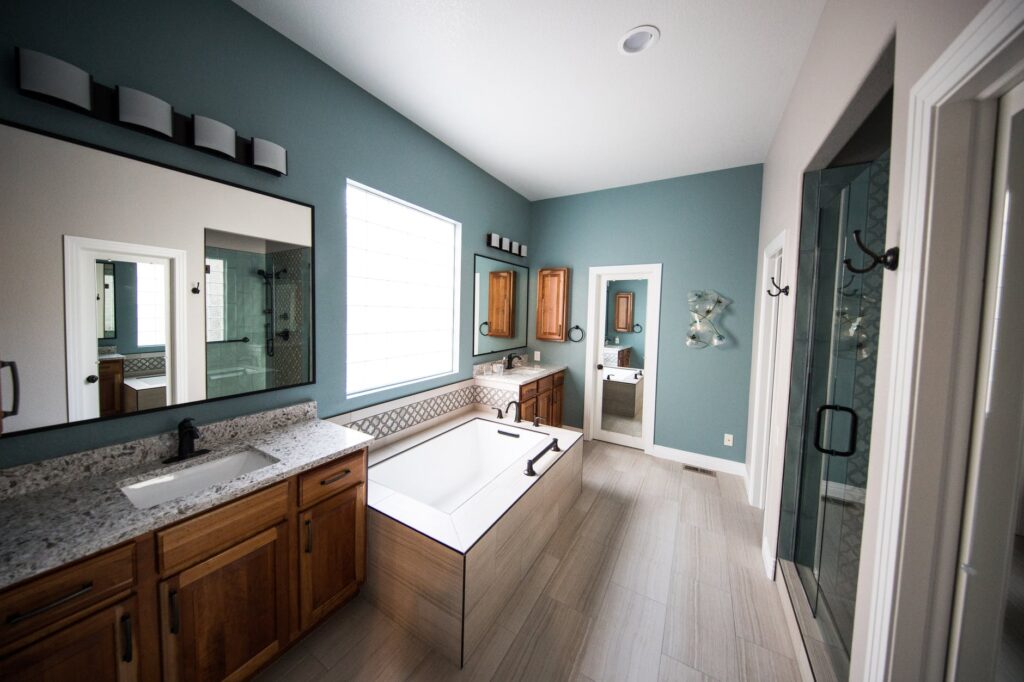
Bright bathroom with a freestanding tub and walk-in shower

Renovation vs remodel

People use these two words to mean the same thing, but there’s a real difference, and it affects your budget.

Renovation

A renovation keeps the layout the same. You’re updating what’s already there. That could be as small as new fixtures and lighting, or as big as a new walk-in shower or tile floor. Renovations usually cost less, and many don’t need a permit. Depending on the work, some parts can be done yourself and some are best left to a pro.

Remodel

A remodel changes the layout. That might mean making the room bigger or moving the toilet, shower or vanity. It costs more and usually needs a contractor. Moving plumbing or adding electrical work will usually need a permit before work starts. A remodel can fix a badly designed bathroom in a way a simple update can’t. It costs more up front, but it can make a much bigger difference to how the room works.

Bathroom renovation cost in Canada

Your cost depends on the work involved, design help and labour, and the materials you choose. Here’s what Canadian homeowners can expect for a typical bathroom in 2026:

Average cost: $18,000

Low-end cost: $6,000

High-end cost: $40,000+

Where you live makes a big difference. Labour in Vancouver and Toronto often runs 30% or more above the national average, while smaller centres, Quebec and Atlantic Canada tend to come in lower. Labour is often 40 to 50% of the total, and licensed plumbers and electricians typically charge about $75 to $150 an hour.

Bathroom size, materials, and the fixtures and finishes you pick will also change the price. Making the bathroom bigger adds the most. New framing, drywall, plumbing and wiring all need to be part of the plan and the budget. For the most accurate number, get a quote from a contractor who can see your space.

Expanding cost: $5,000 – $25,000+

Fixture cost

Fixture prices vary a lot depending on quality. This can be a good place to save, but some fixtures are worth spending a bit more on. Anything you use every day, like the toilet or shower valve, should be good quality so it doesn’t wear out early and need costly repairs. Here’s what to expect for the fixture itself, before installation:

Toilets and sinks: $250 – $2,000

Showers: $500 – $5,000

Vanity: $400 – $6,000

Countertops: $300 – $3,000

Per square foot

Square footage is another way to estimate your cost. Just know that bathrooms cost more per square foot than almost any other room. The plumbing, fixtures and number of trades are about the same whether the room is 40 or 60 square feet, so smaller bathrooms have a higher price per foot.

Full renovation of a standard 40 sq ft main bathroom: about $350 – $650 per square foot

Shower remodel

A shower update can be a project on its own, and it’s one of the most popular. Many homeowners take out the old tub and shower combo and put in one large walk-in shower. Glass enclosures are still a favourite because they make the room feel bigger and brighter. In a primary bathroom, some people add a separate soaker tub, but that’s a personal choice.

Cost: $3,000 – $15,000

Walk-in shower remodel: $8,000 – $20,000

Primary bathroom and aging-in-place

Primary bathroom remodels focus on comfort, quality materials and more space. Many include a soaker tub, a walk-in shower, a single or double vanity, heated floors, and custom cabinets and fixtures.

Primary bathroom cost: $25,000 – $60,000+

Aging-in-place changes depend on what you need. Common updates include a larger walk-in or curbless shower, grab bars, a shower bench, a comfort-height toilet and non-slip floors. Drawers are easier to use than low cabinet doors. If wheelchair access matters, widen the doorway and leave more open floor space. Even if you don’t need grab bars yet, ask your contractor to add wood backing in the walls now. It costs very little during a renovation and a lot more later.

There’s help with the cost, too. If you’re 65 or older, or you qualify for the disability tax credit, the federal Home Accessibility Tax Credit lets you claim up to $20,000 a year in eligible renovation costs. Check the Canada Revenue Agency’s website for the current rules before you start.

Aging-in-place cost: $2,000 – $15,000

Permits

Whether you need a permit depends on the type and size of the work. Simple updates, like new fixtures in the same spot or fresh paint, usually don’t need one. Moving plumbing, adding wiring or building a new bathroom usually does. Every city sets its own rules and fees, and many base the fee on the value of the work. Check with your city before you start. If you’re working with a general contractor, they should know what’s needed and include it in your quote.

Permit cost: $150 – $1,500

Money-saving fixtures

A bathroom renovation can add up, but there are ways to save without cutting corners. Water-saving fixtures are one of the easiest. They lower your water and energy use, so they keep saving you money long after the work is done.

Low-flow showerheads: A standard showerhead uses up to 9.5 litres (2.5 gallons) per minute. A WaterSense-labelled showerhead uses no more than 7.6 litres (2.0 gallons) per minute, and still feels like a good shower.

Low-flow and dual-flush toilets: Most standard toilets use 6 litres (1.6 gallons) per flush. A high-efficiency toilet uses 4.8 litres (1.28 gallons) or less. A dual-flush toilet lets you use a smaller flush for liquid waste and a full flush for solids. Some cities offer rebates on high-efficiency toilets, so check with your local water utility before you buy.

Aerators: These small screens twist onto your sink faucet. They cut the amount of water you use without making the water pressure feel weak.

Refinishing your vanity: If your vanity is solid, think about refinishing it instead of replacing it. Painting or refacing is an easy project that gives it a whole new look. A new vanity, installed, costs about $1,000 – $6,000. Refinishing the one you have usually costs $200 – $1,000.
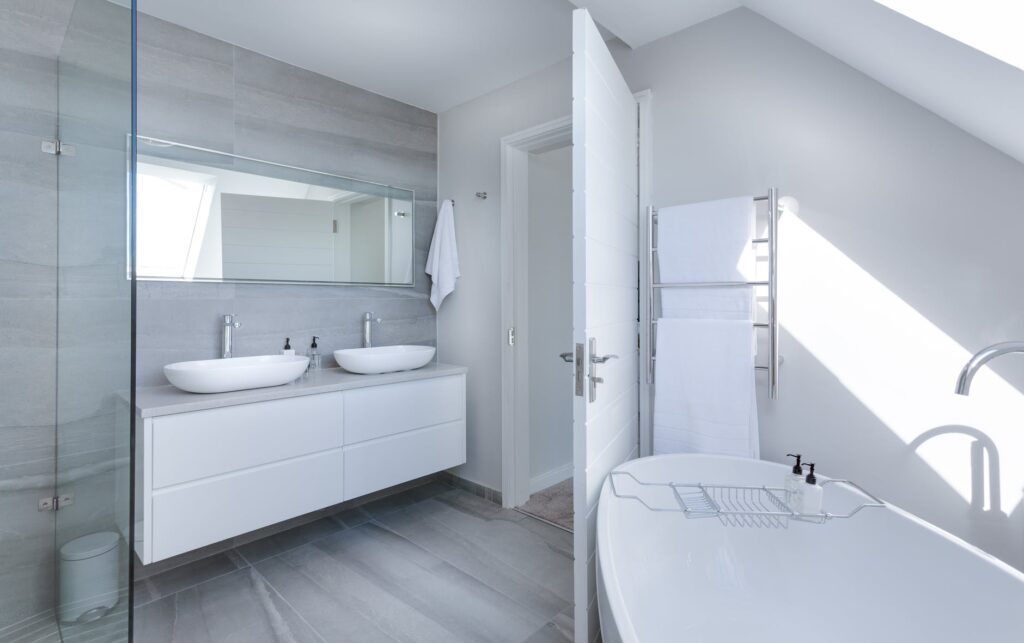
Clean modern bathroom with a white vanity and mirror

Bathroom ROI

Along with kitchens, bathrooms are one of the best rooms to renovate if you care about return on investment (ROI). If you plan to sell, an updated bathroom catches buyers’ attention. Even small cosmetic updates can help a home show better.

These ranges come from the Appraisal Institute of Canada, as shared in CIBC’s guide to home renovation returns:

Bathroom renovation: 75% – 100% recoup

Kitchen renovation: 75% – 100% recoup

New flooring: 50% – 75% recoup

Energy upgrades: 50% – 75% recoup

These are general ranges, not promises. A clean, mid-range update in a popular neighbourhood tends to land near the top. A very personal design, or a luxury bathroom in a modest home, may return less.

DIY vs hiring a professional

Some parts of a bathroom are fine to do yourself, and some are best left to a pro. It comes down to your time, your skills and the quality you want. A full DIY renovation can save money at the start, but there’s no warranty if something goes wrong. Some buyers are wary of DIY work, and any problems or repair costs are yours to deal with.

With a professional, you may spend more up front, but you often save in the long run. A reputable contractor stands behind their work, keeps the project moving, and may get better prices on materials through their suppliers. Licensed plumbers and electricians also make sure the work meets code, which matters for permits, insurance and resale. You can still mix the two. Doing some of the work yourself and leaving the rest to a pro can save money without giving up quality.

DIY work

Take on the easier jobs yourself, like painting or shopping for fixtures ahead of time. High-end fixtures add up fast, and a well-chosen budget fixture can look just as good. If you have time, you can also do some of the demolition, like pulling out old tile or an old vanity, as long as you’re careful around the pipes. That alone can save $1,000 or more in labour. One important note: if your home was built before 1990, have the materials tested for asbestos before you start breaking anything apart. Refinishing what you can, like the vanity or countertop, also saves a lot compared to buying new. In the end, your bathroom will cost less, and it can look just as good.

Ready to get quotes? Tell us about your bathroom and our team will connect you with verified, reputable contractors in your area. It’s free. Post your bathroom project

Find RenovationFind certified bathroom renovation companies now!

RenovationFind Certified is a symbol of integrity held by only the most trustworthy companies in home improvement, service and maintenance.

This post first appeared on https://blog.renovationfind.com

What to Know Before Installing an EV Charger at Home

Electric vehicle connected to professionally installed home EV charger in Vancouver

Electric vehicles are becoming a practical choice for more Canadian drivers, and one of the biggest advantages of owning an EV is being able to charge it at home.

Instead of relying entirely on public charging stations, homeowners can plug in when they arrive home and allow the vehicle to charge while it is parked.

However, adding charging equipment is not as simple as choosing a location on the garage wall. A professional EV charger installation in Vancouver requires consideration of the existing electrical system, available capacity, wiring route and charging equipment.

Cooper Electrical Contracting Ltd. provides EV charging station installations and upgrades for residential and commercial properties. The company notes that installation requirements can vary depending on the distance between the electrical service panel and the EV charger and whether the property requires an electrical service upgrade.

Table of Contents

Start with your charging needs

Before installation, consider how the vehicle will normally be used.

Some drivers travel relatively short distances each day and have long periods available for overnight charging. Others drive much farther and may want faster charging so the battery can recover more quickly between trips.

Your vehicle, driving patterns and available charging time all affect what type of setup makes sense.

Homeowners should also think beyond their current vehicle. If another household vehicle could become electric in the future, mentioning that during the planning process can help the electrician understand potential future requirements.

Have your electrical system assessed

An EV charger adds a substantial electrical load to the home.

Before installing charging equipment, an electrician can examine the electrical panel and determine whether the existing service has sufficient capacity for the proposed charger.

This assessment also provides an opportunity to consider other major electrical loads in the home, such as electric heating and large appliances.

If additional electrical capacity is required, a Vancouver EV charger electrician can explain what upgrades may be necessary before the charging equipment is installed.

Cooper Electrical Contracting specifically notes that some EV charger projects can require an electrical service upgrade.

Knowing this before purchasing equipment or beginning construction helps homeowners understand the full scope of the project.

Charger location matters

Where the charger is installed can affect both convenience and installation requirements.

Ideally, the charging cable should comfortably reach the vehicle’s charging port without creating a tripping hazard or requiring awkward parking.

The distance from the electrical panel also matters because the charger requires wiring from the electrical source to its installation location.

Cooper Electrical Contracting notes that EV charger installation costs can vary depending on the distance that wiring and conduit must travel between the service panel and charging equipment.

For attached garages, the wiring route may be relatively straightforward. Detached garages, outdoor parking areas or properties where the panel is far from the parking location can involve additional planning.

An electrician can review potential charger locations and help determine the practical electrical requirements of each option.

Consider how you actually park

The best charger location on paper is not always the most convenient location in daily life.

Think about where the vehicle normally sits, which direction it faces and where the charging port is positioned on the vehicle.

If two vehicles share a garage or driveway, consider whether the charger could remain accessible if parking arrangements change.

Planning these details before installation can prevent the charging cord from having to cross walkways or stretch farther than intended.

Electrical work should be completed professionally

EV charging equipment handles a significant electrical load for extended periods, so installation is not an ideal DIY project.

Cooper Electrical Contracting advises homeowners not to attempt electrical service work unless they are qualified and notes that permits and inspections may be necessary for safe and legal EVSE installation.

Professional installation ensures that the electrical requirements of the charger can be evaluated alongside the home’s existing system.

A qualified electrician can install the appropriate circuit and wiring, complete any required upgrades and confirm that the equipment is connected correctly.

Think about future vehicles

An EV charger may remain on the property longer than the vehicle you currently own.

When planning the installation, it may be worth discussing whether your household expects to add another electric vehicle later.

That does not necessarily mean installing two chargers immediately. However, considering future charging demand can influence decisions about electrical capacity and infrastructure today.

For homeowners already planning a larger electrical or panel upgrade, combining future EV requirements with the overall electrical plan may be more practical than treating every improvement as a separate project.

Home renovations can be a good time to prepare

If your home is already undergoing renovations, it may be an ideal opportunity to discuss EV charging with the electrician.

Electrical wiring can sometimes be easier to install while walls, ceilings or other areas are already open for construction.

Even homeowners who do not currently own an electric vehicle may want to consider whether EV charging could be part of their future plans.

Cooper Electrical Contracting provides residential electrical renovations, circuits, breakers, panel work and electrical installations in addition to EV charging services.

Combining these discussions can create a more coordinated electrical plan.

Commercial properties can install charging too

EV charging is not limited to detached homes.

Businesses, commercial buildings and other properties may choose to provide charging for employees, customers or fleet vehicles.

Commercial installations can involve different electrical and operational considerations depending on the number of chargers and how they will be used.

Cooper Electrical Contracting provides EV charging services for both residential and commercial applications and also works on commercial electrical systems, panel upgrades and power distribution.

An electrical contractor can evaluate the existing system before charging infrastructure is added.

Ask about applicable incentives

EV charger incentive programs and eligibility requirements can change over time, so homeowners should check current programs before beginning a project.

Cooper Electrical Contracting recommends keeping receipts for qualifying EV charging equipment and installation because applicable rebate opportunities may be available.

Before relying on a rebate when budgeting, confirm the current eligibility rules, approved equipment requirements and application deadlines directly with the program administrator.

Choose an experienced electrical contractor

The charging station itself is only one part of an EV charging project. The condition and capacity of the home’s electrical system, wiring route, panel and installation requirements all need to work together.

Cooper Electrical Contracting states that it has 25 years of electrical-industry experience and provides residential and commercial electrical installations, repairs, upgrades and specialized electrical services throughout the Lower Mainland.

For homeowners considering a home EV charger in Vancouver, having the electrical system professionally evaluated before installation can help create a safe, convenient charging setup that fits both the vehicle and the property.

This post first appeared on https://blog.renovationfind.com

When Should You Consider an Electrical Panel Upgrade?

Electrician inspecting and upgrading a residential electrical panel in Vancouver

The electrical panel is one of the most important components of a home’s electrical system. It distributes electricity among the circuits that supply lighting, outlets, appliances and other electrical equipment throughout the property.

As homes add more technology and electrical equipment, the demands placed on the electrical system can change. Renovations, new appliances, electric heating and EV chargers can all affect how much electrical capacity a household requires.

For some properties, an electrical panel upgrade in Vancouver may become part of preparing the home for these additional demands.

Cooper Electrical Contracting Ltd. provides residential and commercial electrical services throughout the Lower Mainland, including breakers and fuses, panel upgrades, code corrections, electrical safety inspections, renovations and electrical installations.

Table of Contents

What does the electrical panel do?

Electricity entering the home is distributed from the main panel to individual circuits.

Each circuit is designed to supply specific areas or equipment. Breakers provide protection by interrupting the circuit under certain electrical conditions.

As homeowners add electrical equipment, existing circuits and the overall service need to remain appropriate for the home’s requirements.

An electrical panel does not necessarily need replacement simply because it is older. Instead, a qualified electrician can inspect the system and determine its condition, available capacity and suitability for planned upgrades.

Frequent breaker problems deserve attention

A breaker that trips once because too many devices were connected to the same circuit may have an obvious explanation. Repeated breaker trips, however, deserve further investigation.

Cooper Electrical Contracting advises that if a breaker has been properly reset and power does not return, the problem may require immediate professional attention.

Rather than repeatedly resetting a breaker without understanding why it trips, homeowners can have an electrician troubleshoot the circuit.

The issue may involve the equipment connected to the circuit, the circuit itself or another component of the electrical system. Proper troubleshooting identifies the cause before the appropriate repair or upgrade is recommended.

Renovations can increase electrical demand

Major renovations are one of the most common times homeowners reevaluate their electrical systems.

A kitchen renovation can add new appliances, receptacles and lighting. Basement development may introduce additional living areas, electric heating and entertainment equipment. Home offices can add computers, monitors and networking equipment.

If several projects are completed over time, the home’s electrical requirements can become very different from when the original system was installed.

Before construction starts, a licensed electrician in Vancouver can review planned electrical loads and determine whether the existing panel and circuits are suitable.

Doing this at the beginning of a renovation helps reduce surprises after new equipment has already been purchased.

EV chargers may require an electrical assessment

Electric vehicles have introduced another major electrical load into many households.

Home charging provides significant convenience, but the installation needs to be properly planned. Cooper Electrical Contracting notes that EV charger installation costs can depend partly on the distance between the electrical panel and charger location and whether an electrical service upgrade is necessary to support the charger.

Before installation, an electrician can evaluate the existing electrical system and determine how the charging equipment should be supplied.

This is another reason panel capacity should be considered as part of a broader electrical plan rather than looking at individual upgrades separately.

Electric heating can affect capacity

Electric heating systems can also place substantial demands on a home’s electrical system.

Homeowners adding or expanding electric heating should have the electrical requirements assessed before installation.

Cooper Electrical Contracting includes electric heating among its residential services, along with circuits, breakers and electrical installations.

Coordinating these systems through one electrical plan can help ensure the circuits and equipment are properly designed for the intended use.

Older homes may have undergone many electrical changes

A property does not remain electrically unchanged throughout its life.

Previous owners may have renovated kitchens, finished basements, installed lighting or added appliances. Over several decades, these changes can create a system containing components from several different periods.

A professional inspection can help homeowners understand what is currently installed.

Cooper Electrical Contracting provides electrical safety inspections and code corrections as part of both its residential and commercial services.

This can be especially useful before purchasing a home, beginning a large renovation or adding equipment with significant electrical requirements.

Watch for damaged electrical components

Not every electrical concern originates at the panel.

Outlets, switches and wiring can also show signs that professional attention is required. Cooper Electrical Contracting identifies a broken outlet, one that no longer holds plugs securely or one that becomes warm as reasons to have the outlet replaced by a professional.

Homeowners should avoid assuming that a visible electrical problem is isolated. An electrician can determine whether the issue is limited to the device or connected to something elsewhere in the circuit.

Think about future electrical needs

When homeowners are already considering an electrical upgrade, it can be helpful to discuss future plans.

Are you considering an electric vehicle? Will the basement eventually be renovated? Are you adding a workshop, hot tub, air conditioning or additional electric heating?

The answers can help an electrician recommend an approach that considers more than the immediate project.

Planning ahead does not necessarily mean installing everything today. It means understanding how future upgrades could affect the home’s electrical system so decisions made now do not unnecessarily complicate later projects.

Electrical upgrades are also about safety

Capacity is only one part of an electrical system.

Homeowners may also benefit from reviewing GFCI protection, smoke detectors and surge protection when completing broader electrical upgrades.

Cooper Electrical Contracting provides smoke detector installation, surge protection and electrical safety inspections. The company also explains that GFCIs are designed to interrupt electrical flow when current follows an unintended path, helping protect people in locations where electricity and water could come into contact.

Have the system professionally assessed

There is no single rule that determines when every property needs a new panel. Homes differ in age, construction, existing electrical equipment and future requirements.

A professional assessment can determine whether repairs, new circuits, panel modifications or a larger upgrade should be considered.

Cooper Electrical Contracting has 25 years of electrical-industry experience and provides electrical installations, troubleshooting, maintenance, repairs and upgrades throughout the Lower Mainland.

If you are planning renovations, new equipment or an electrical service upgrade in Vancouver, reviewing the entire system first can help ensure the home is prepared for the way you intend to use it.

This post first appeared on https://blog.renovationfind.com

This website nor its owners are an actual service provider, this website is a referral service. When you place a phone call from this website, it will route you to a licensed, professional service provider that serves your area. For more information refer to our terms of service.

© LocalHandymanUSA.com

(877) 959-3534